This summer, I technically was in school. But realistically, I had the best summer vacation of, well, pretty much my whole life.
Wait... you were in school all Summer and had a great time?! What? Slow down there a sec... explain yourself immediately!
Happy to. You see, I took an oil painting class over the Summer. Yep, real, legit painting with real, legit oil paints. So, I got grades and assignments, and credits for this class. It'll even go on my transcript. But at the same time, I had an awesome, fun, creative and low-stress time. The perfect vacation from Chemistry and Math, if you ask me.
The Still Life Setup
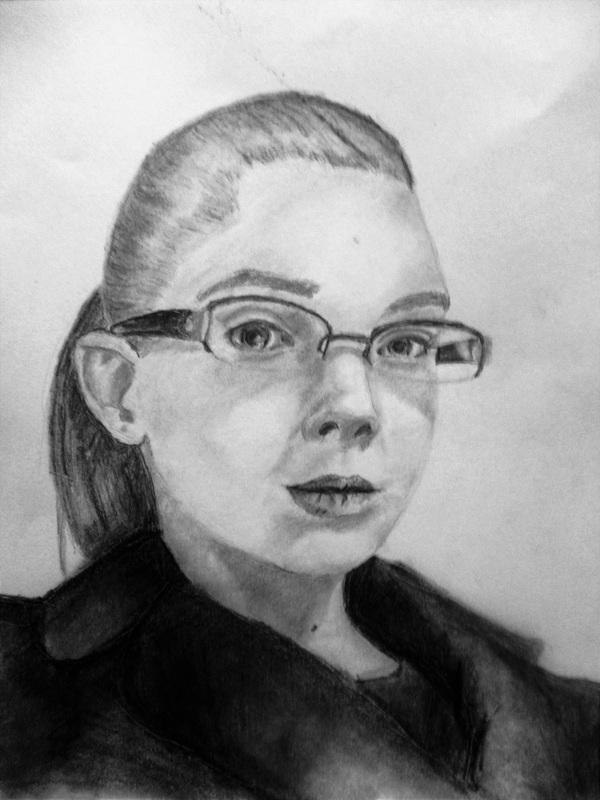
In this class, we (meaning my classmates and I) painted several things. But some of them don't count as paintings in my book because they were small exercises or color charts. So I ended up painting five "real" paintings. I took progress photos of most of these as I went.. first photo being the canvas drawing, then a few more as the paint progressed.
Unfortunately - I misplaced my camera near the end of the semester (yes, Summer classes still have a semester). So I lost all of those progress photos! In fact, the only paintings that I have progress photos for are the last two ones that I did. :(
I'll show the photos for one of those two paintings here. The second one comes in a future post. Now I shall begin to bombard you with photos and more lengthy explanations.
Glazed Still Life Painting
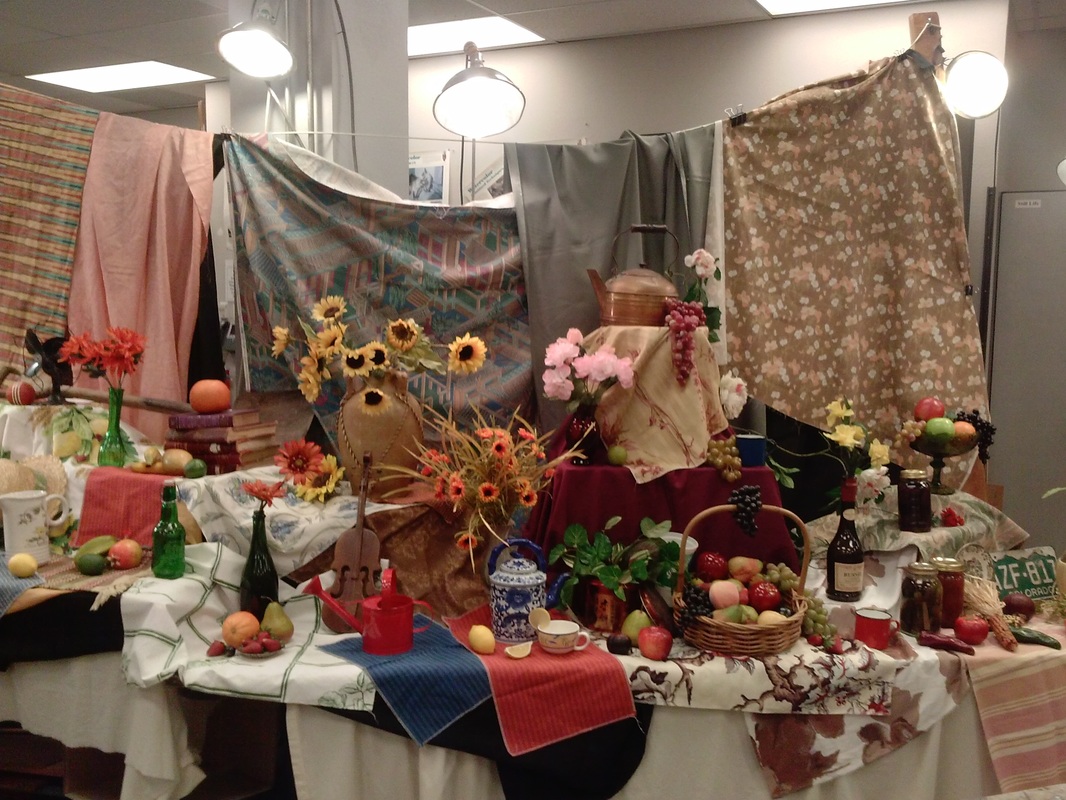

In this project, my instructor set up a huge arrangement of summer-themed objects. Then us students got to choose a part of the setup that we liked, and paint it. I really wanted a setup that was aesthetically pleasing, with a somewhat rustic look to it. After narrowing it down to some books with an orange on top of them and the kettle with grapes, I decided on the kettle.
The painting
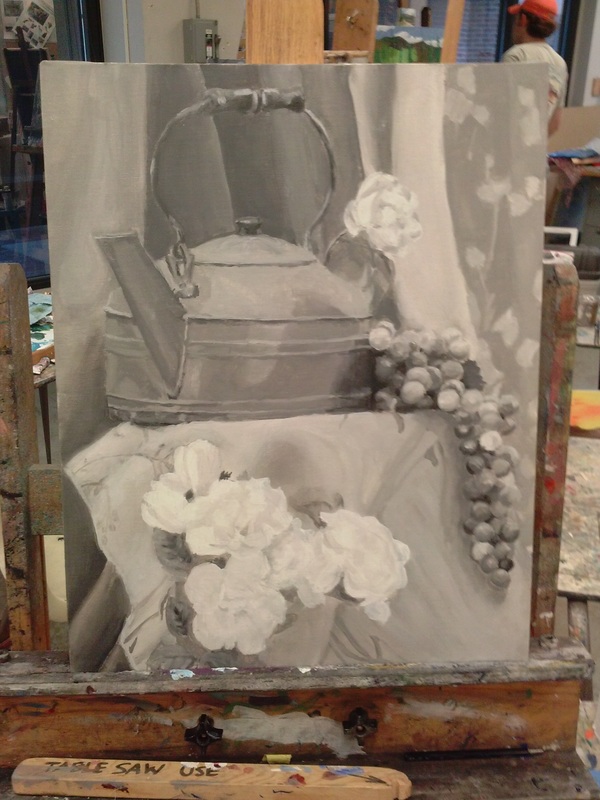
The method we were learning to use in this assignment is called glazing. The process goes something like this:
In the below gallery, you can see that I forgot to take photos until the under-painting was complete. Oh well.
- Sketch the setup.
- Paint in gray-scale with a thinned out layer of paint. This is the "underpainting"
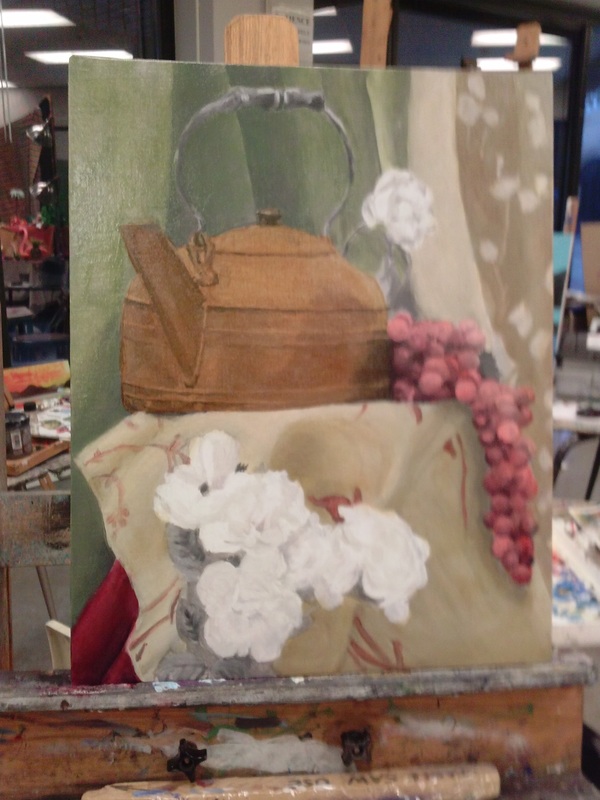
- When dry, add transparent "glazes" of color. Each object is done in one single color at this point.
- Build up more layers of transparent color, letting each layer dry before adding the next one. At this point, different colors can be added to different areas of each object in order to match it better.
- Add the shadow glazes. These are darker and richer. May be less transparent than the previous layers.
- Add the highlights. These are much more opaque and some may be completely opaque.
In the below gallery, you can see that I forgot to take photos until the under-painting was complete. Oh well.
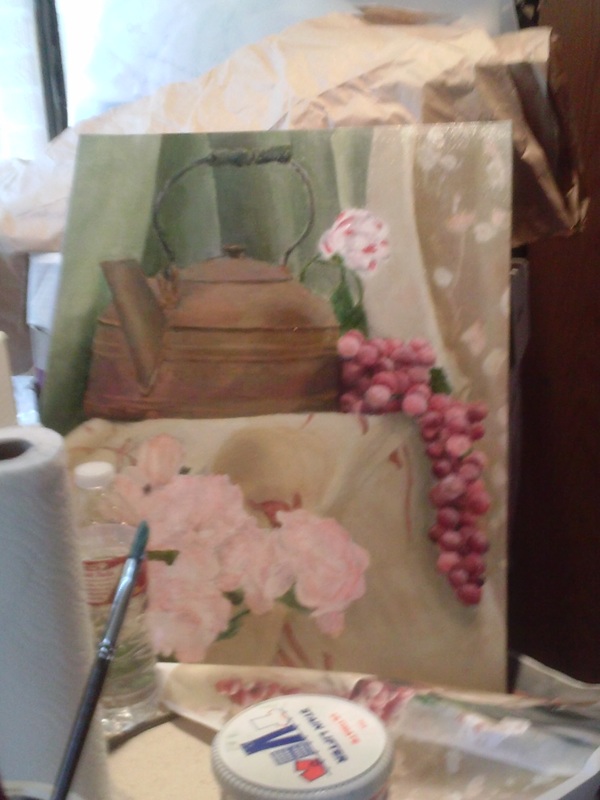

And the final painting, after shadows and highlights have been added!

Final painting
This was a really fun painting to do. There are definitely things I would change if I were to do it again, and the process was very time consuming and frustrating at times. But overall, I'm kinda okay with how it turned out. I might touch up some things later on, though, like the pink flowers in the foreground and the green fabric in the background.
You can't really tell in the photo, but the painting has a very glossy and luminous finish to it. This is due to the built up layers of transparent colors. It's one of the awesome qualities of the glazing method. :D
You can't really tell in the photo, but the painting has a very glossy and luminous finish to it. This is due to the built up layers of transparent colors. It's one of the awesome qualities of the glazing method. :D
Check back later for more painting posts, and consider subscribing!